Jim Lundgren Photography
Sunday, August 28, 2011
Sunrise in the Alabama Hills
The Alabama Hills are probably the most well known and least well known area in California. Most residents of the state have never even heard of the spot but every nature photographer across the western hemisphere knows where it is. Lying in the middle of the Owens Valley on the eastern face of the Sierra Nevada, they are very remote and long drive from any major city but a treasure trove of opportunity for a photographer. As a result, the area has been shot to death over the last two decades by hoards of professionals and amateurs. In addition, the rocky hillsides have been used to film several car commercials every year and many major Hollywood Westerns were filmed around these same boulders. Even so, the Alabama Hills remain one of my favorite parts of California. I just make sure to arrive mid-week.
Thursday, August 18, 2011
Spooky Gulch
There is probably no wilder or more remote area in the lower 48 states than the canyon-laced lands southeast of Escalante, Utah. Most of the canyons are located long distances from the roads and require difficult hikes to get to but Spooky Gulch is an exception, lying less than a mile from the trailhead. To get to the trailhead though, requires a bone jarring drive of nearly 30 miles over washboard dirt roads.
Spooky Gulch is over 30 feet deep, rarely wider than a few feet, and narrows down to under 18" in spots. I had to take my backpack off and hike sideways for a good chunk of the time. While I am always nagging people to use the time around sunrise and sunset to do most of their photography, slot canyons are different. The slots are so high and narrow, the sun has to be nearly overhead to bounce any light off the walls and down to the floor of the canyon. Save you sunrises and sunsets for the sandstone landscapes above, slot canyons are best during the middle of the day.
Spooky Gulch is over 30 feet deep, rarely wider than a few feet, and narrows down to under 18" in spots. I had to take my backpack off and hike sideways for a good chunk of the time. While I am always nagging people to use the time around sunrise and sunset to do most of their photography, slot canyons are different. The slots are so high and narrow, the sun has to be nearly overhead to bounce any light off the walls and down to the floor of the canyon. Save you sunrises and sunsets for the sandstone landscapes above, slot canyons are best during the middle of the day.
Sunday, August 14, 2011
Thursday, August 11, 2011
Autumn in Leidig Meadow, Yosemite Valley, California
A little fun with Photoshop for a special project. The original color image was converted to black and white and then toned. The opacity of the black and white layer was then reduced to allow a little of the original color to bleed through. The grain was added into the image to create a raw film-like quality. Finally, the image was printed on stretched canvas.
Friday, August 5, 2011
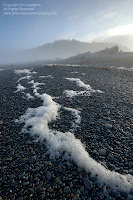
5 Tips For Better Beach Photography
 Get Down Low: I've said it before and I will say it again, "it ain't nature photography until you are getting your knees dirty." Lowering your viewpoint close to the ground is one of the easiest things you can do to improve your composition. Try using a wide angle lens and catch the waves rushing across the sand inches in front of you. Get down low next to that interesting rock formation at your feet and make it seem larger than life. Go get some sand on your pants and pebbles in your shoes. You will come home with some great images. Just remember to keep an eye on the waves and the camera out of the salt water!
 Get Up High: Photographers spend most of their time on the beach when they are at the coast. You can consistently get great images on the sandy or rocky shores but don't pass up opportunities to shoot from the bluffs above. You can use wide angle lenses to include the details on the ground near you as well as the beach below. This is also a great opportunity to pull that long telephoto lens out of your bag and shoot down the beach. Longer focal lengths compress the foreground and the background, creating some very unique and interesting effects. But please, please make sure your tripod is secure when you are close to the edge of the cliff. I learned that the hard way (a story for another time).
Change Your Speed: Put your camera on a tripod and use a small aperture to lengthen the shutter speed. Moving water will blur as it breaks across the sand. Shutter speeds near 1 second can create a soft silky ethereal effect to the water. You can also use faster shutter speeds to freeze the water in mid air, showing the power of a wave crashing against the rocks. Shutters speeds faster than 1/500 of a second can record spray as a myriad of drops suspended in mid-flight. Try varying the shutter speed and experiment with the results.
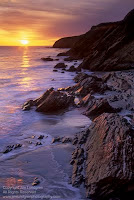
Stay Up Late-Get Up Early: Time of day...Time of day...Time of day. I can't say those three words enough. If a scene is beautiful during the afternoon hours, it will be spectacular during the evening hours. Eat an early dinner and get out there near sunset. Drag yourself out of bed before sunrise and you will be rewarded. Warm tones and long shadows give depth to subjects and create visual lines through the image. And please don't leave the minute the sun goes down. Professional photographers call the next hour of light "the magic hour" for a reason. The colors can reflect off the clouds in spectacular fashion and the entire landscape is frequently bathed in a soft diffused glow. Oranges and reds give way to dark blue skies as night begins to fall. Don't forget your tripod. Exposures are frequently several seconds long. You have my permission to leave when you can't see the controls on the camera any more.
Bad Weather-No Problem: Many photographers frequently cancel their photo shoots outdoors as soon as the rain begins. I promise that there is no other consistently dramatic moment than the first minutes when a storm begins to clear. If you are not there, toughing out the weather, you are not going to be there when the clouds begin to part. Every time I get depressed as the rain continues to fall, I try to stay motivated by remembering most of my best images were taken after enduring bad weather (sometimes for days on end). If nothing else, storms always lead to great stories to tell your friends.
The next time you are visiting the ocean's edge, try some of the techniques above and create some images that live up to your memories.
Subscribe to:
Comments (Atom)


