Exposing an image is similar to filling a glass of water at a faucet. You can turn the faucet on very slowly and dribble the water in for a long time, or you can open the faucet wide for a very short time and fill the glass quickly. The goal is simply to fill the glass full with the correct amount of water.The lens acts in a similar manner. You simply want to expose the sensor to the correct amount of light. There are three basic controls on every camera to accomplish this task.
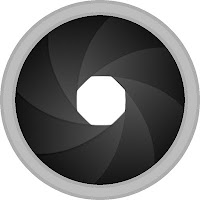
 Aperture: The aperture is the size of the opening of the shutter. They are those funny numbers on the barrel of the lens (4, 5.6, 8, 11, 16, 22). You might see them referred to with a f/ in front of them like f/8 or f/16. Modern digital cameras may only have the aperture on the LCD display screen. Counterintuitively, the numbers are inverses. The smaller the number, the larger the opening and the larger the number, the smaller the opening. The aperture acts like the faucet on the sink. Small openings (f/22, f/16) are similar to dribbling the water into the glass. Large openings (f4, f5.6) act like turning the faucet on full force. To fully fill the glass, you need to leave the faucet on for a certain length of time which brings us to...
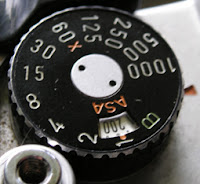
 Shutter Speed: The shutter speed is usually found on a control dial on old film cameras and on the display screen for nearly all digital cameras. The numbers may be as short as 1/5000 of a second (it may be displayed as 5000) to as long as several seconds or even minutes (usually referred to as 2 sec, 2", 2 min, or 2' on the LCD screen). The shutter speed is analogous to how long you leave the faucet open. If you open the faucet just a crack then you need to leave it open for a long time to fill the glass. If you crank that sucker wide open, then it takes a very short time to fill the glass. On a camera lens, the shutter speed is simply the time the aperture is open and letting light stream through to strike the sensor.
ASA or ISO (same thing): OK, this is where the water glass analogy breaks down. The ASA is simply the sensitivity of the sensor to the light falling on it. Lower numbers (ASA 100, ASA 200) are less sensitive to light and require longer shutter speeds or larger aperture openings. Higher numbers (ASA 1000, HI) can use faster shutter speeds and smaller apertures.
As you might guess, there are trade-offs and advantages to all of these controls and we will talk about those in the next lesson. While you are waiting with anxious anticipation, try fiddling with your camera. Set the camera on automatic mode and change the aperture. Watch how the camera adjusts the shutter speed to compensate for your changing the size of the opening. Next, set the camera controls to manual and pick an aperture and shutter speed (if it is sunny, try starting at 1/125 of a second at f/8 at 100 ASA). After checking the exposure in the LCD screen, try adjusting the shutter speed while leaving the aperture alone. You should start to see a change in exposure. Have fun and I will see you for the next lesson.
No comments:
Post a Comment